Add Boundaries to Sale Map
![]()
To add a property boundary to a sale, open the mapping section on a sale; it can be an existing sale or a new sale.
Click on Load Map and zoom to the area desired.
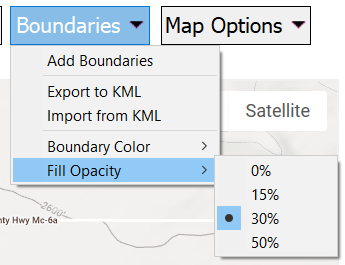
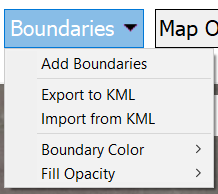
There is a “Boundaries” drop down button, that includes five options: Add Boundaries, Export to KML, Import from KML, Boundary Color and Fill Opacity.
There are 2 ways to enter boundaries.
The 1st method is to manually place the polygon points.
|
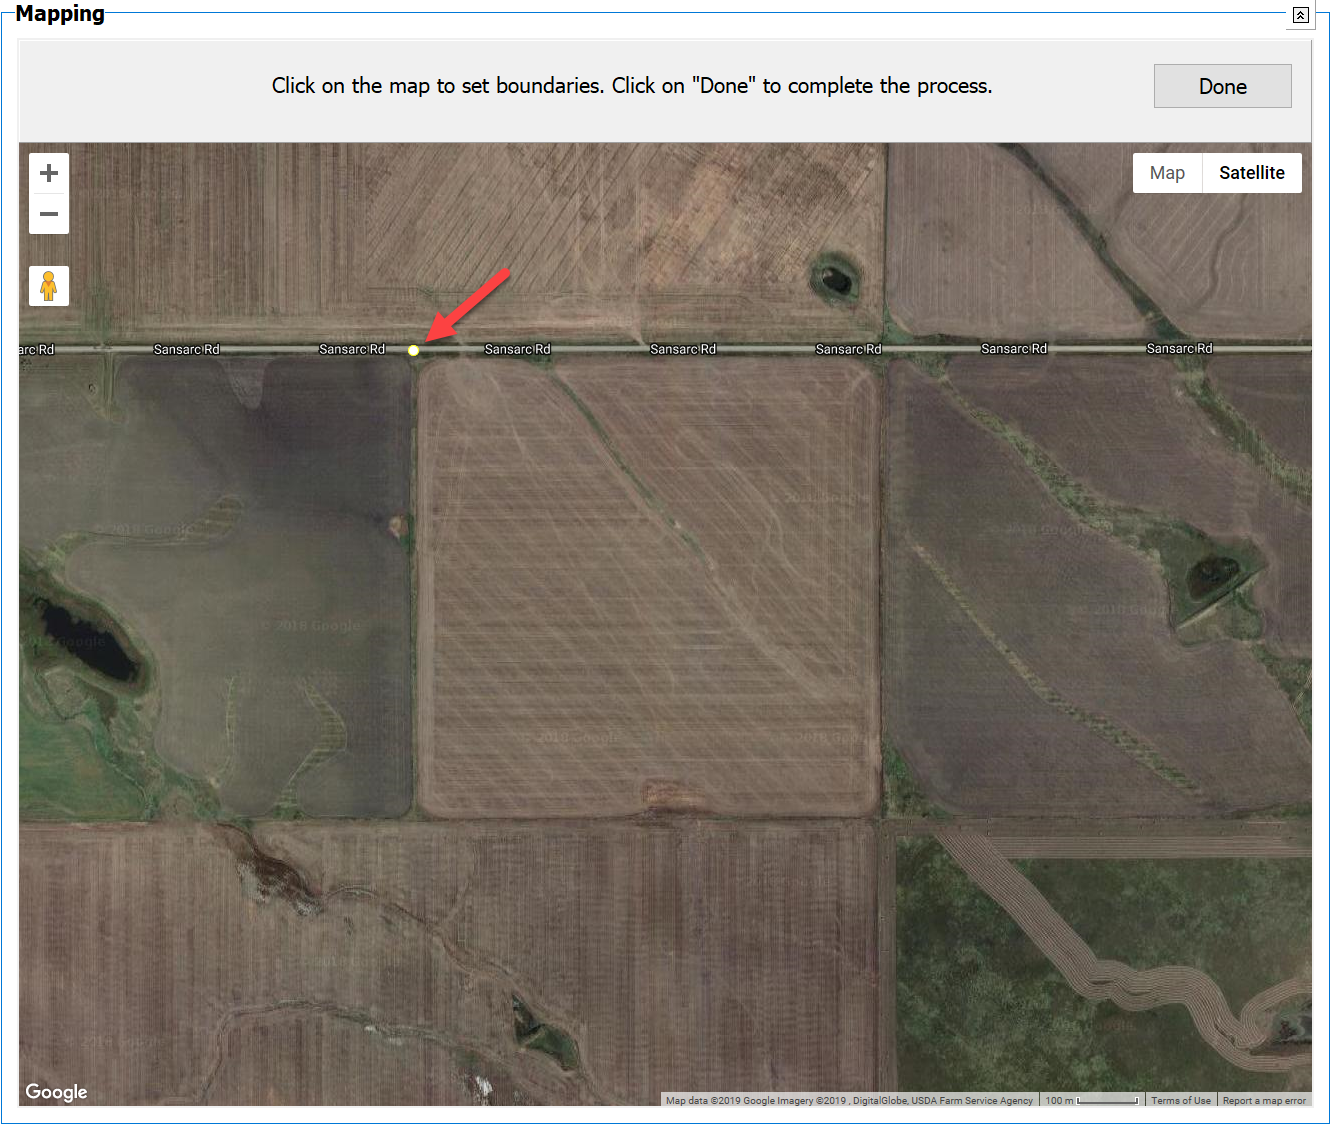
In the boundaries drop-down, choose Add Boundaries. On the map, click where you want the 1st polygon point.
|
Click on the second point
|
|
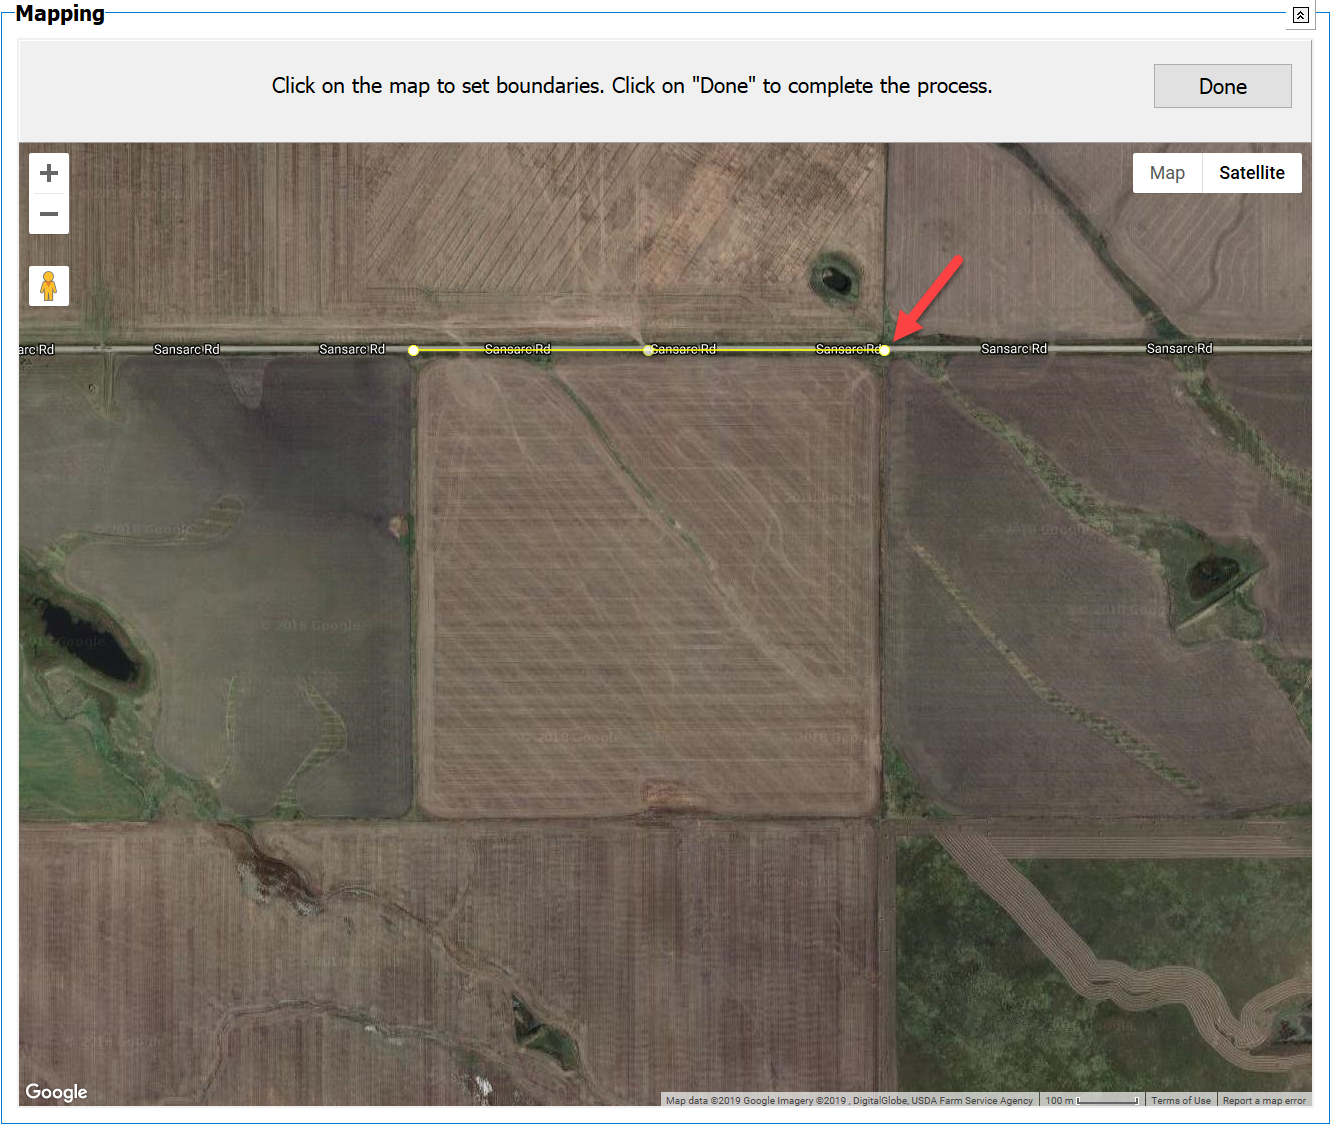
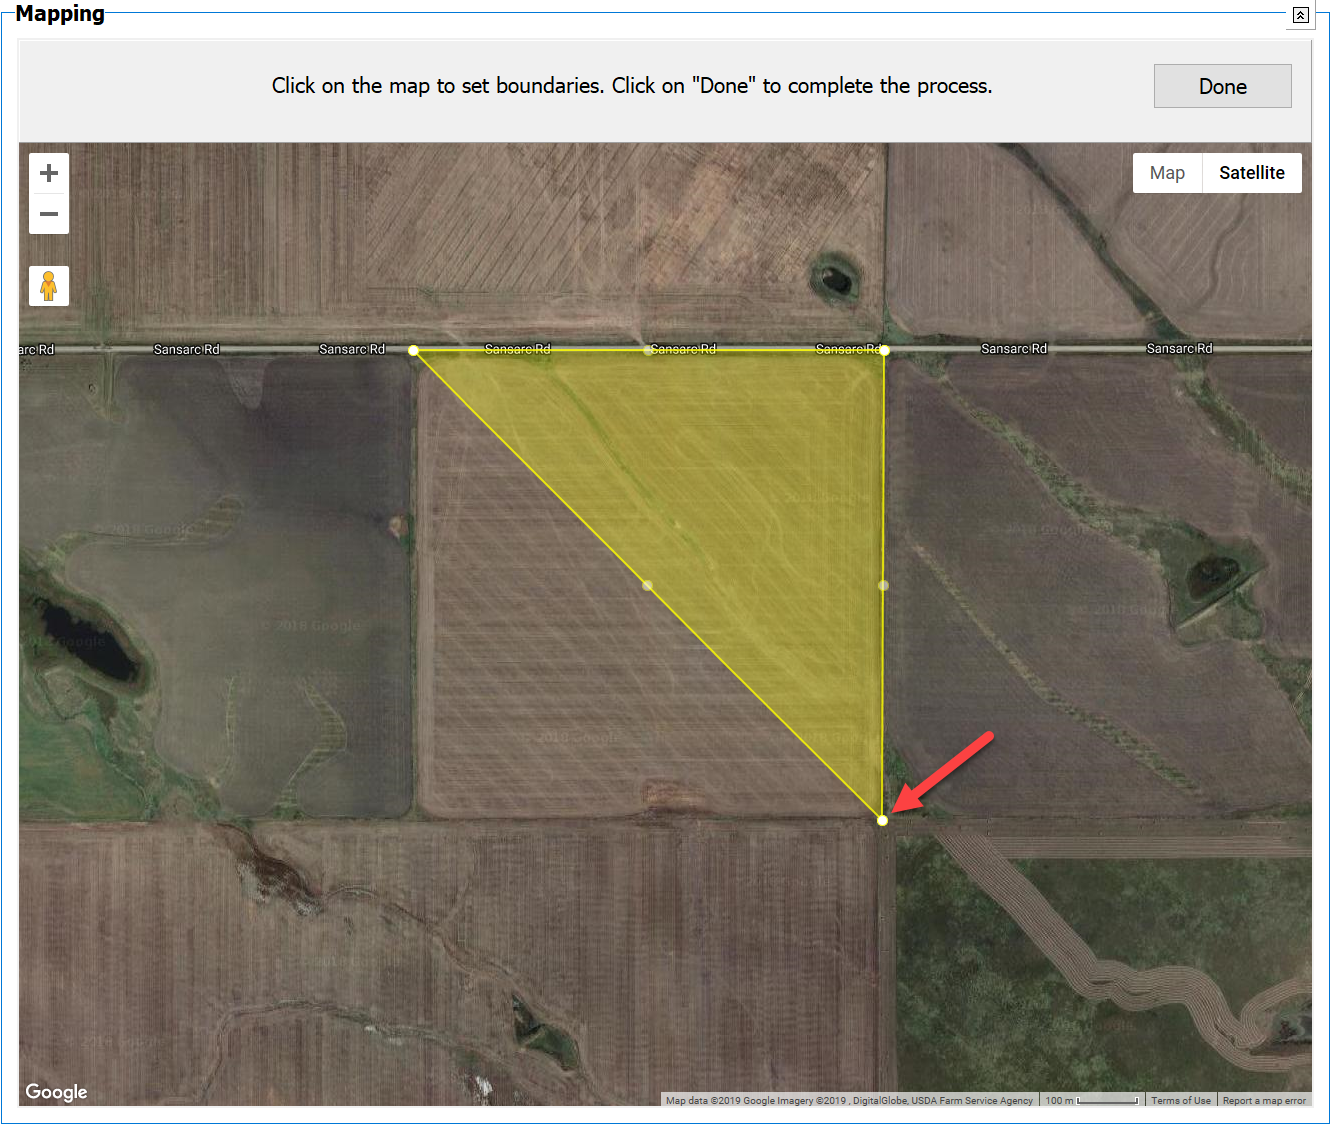
After 3 points are added, the area will auto fill. You can still add more points by clicking on the next boundary point.
|
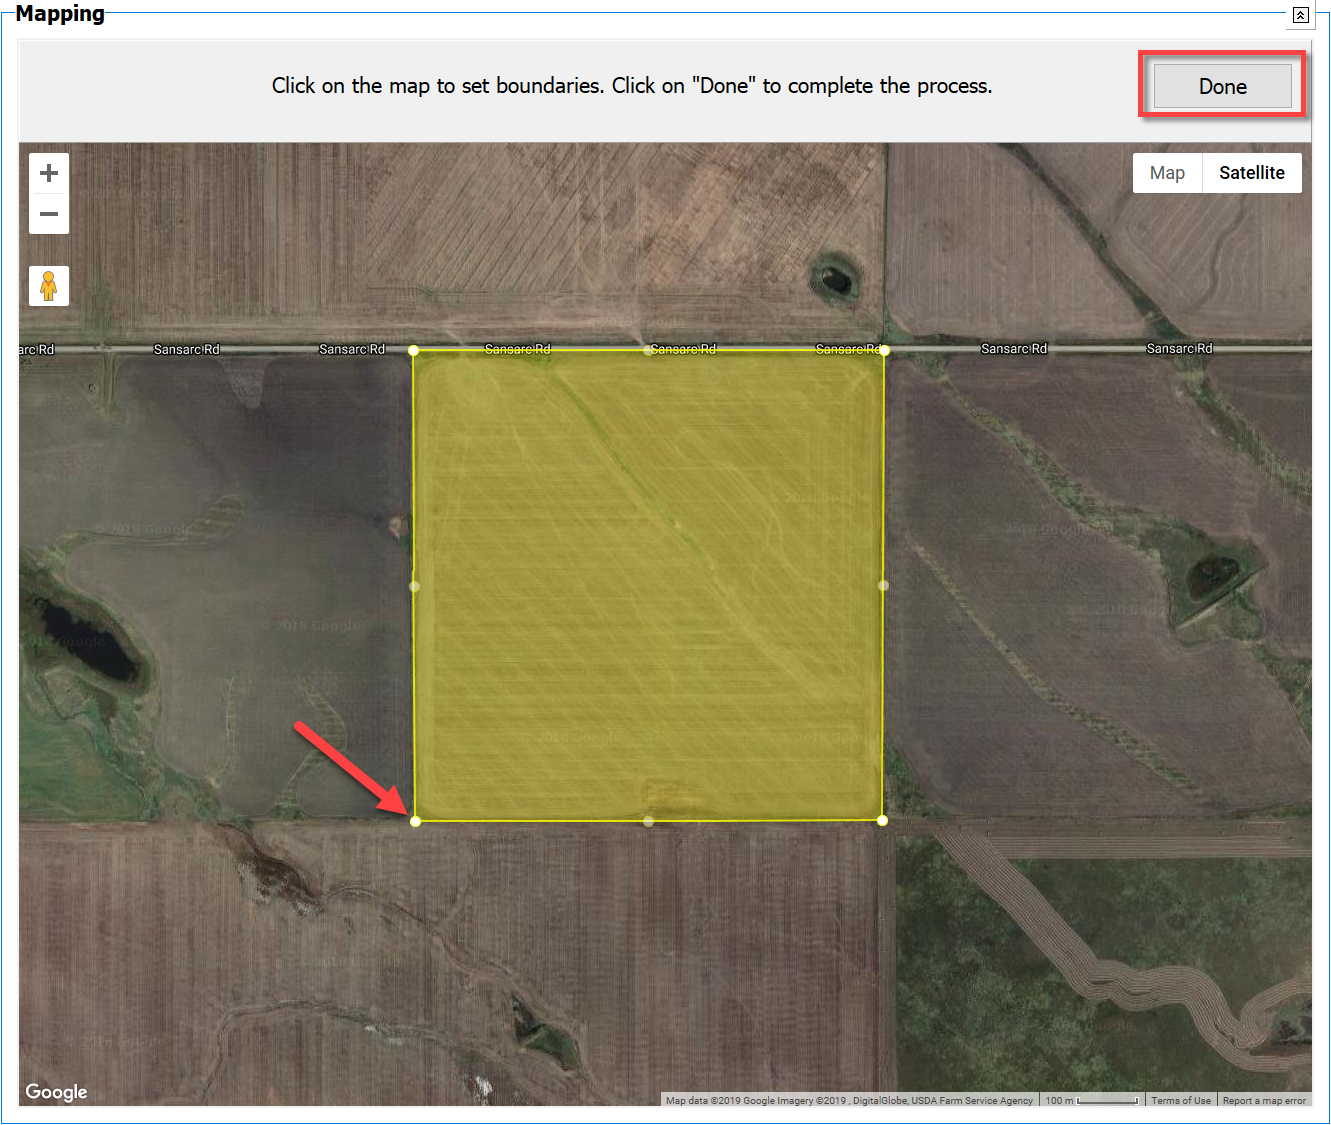
After adding all polygon points, click on Done. A pin will automatically drop in the center of the polygon
|
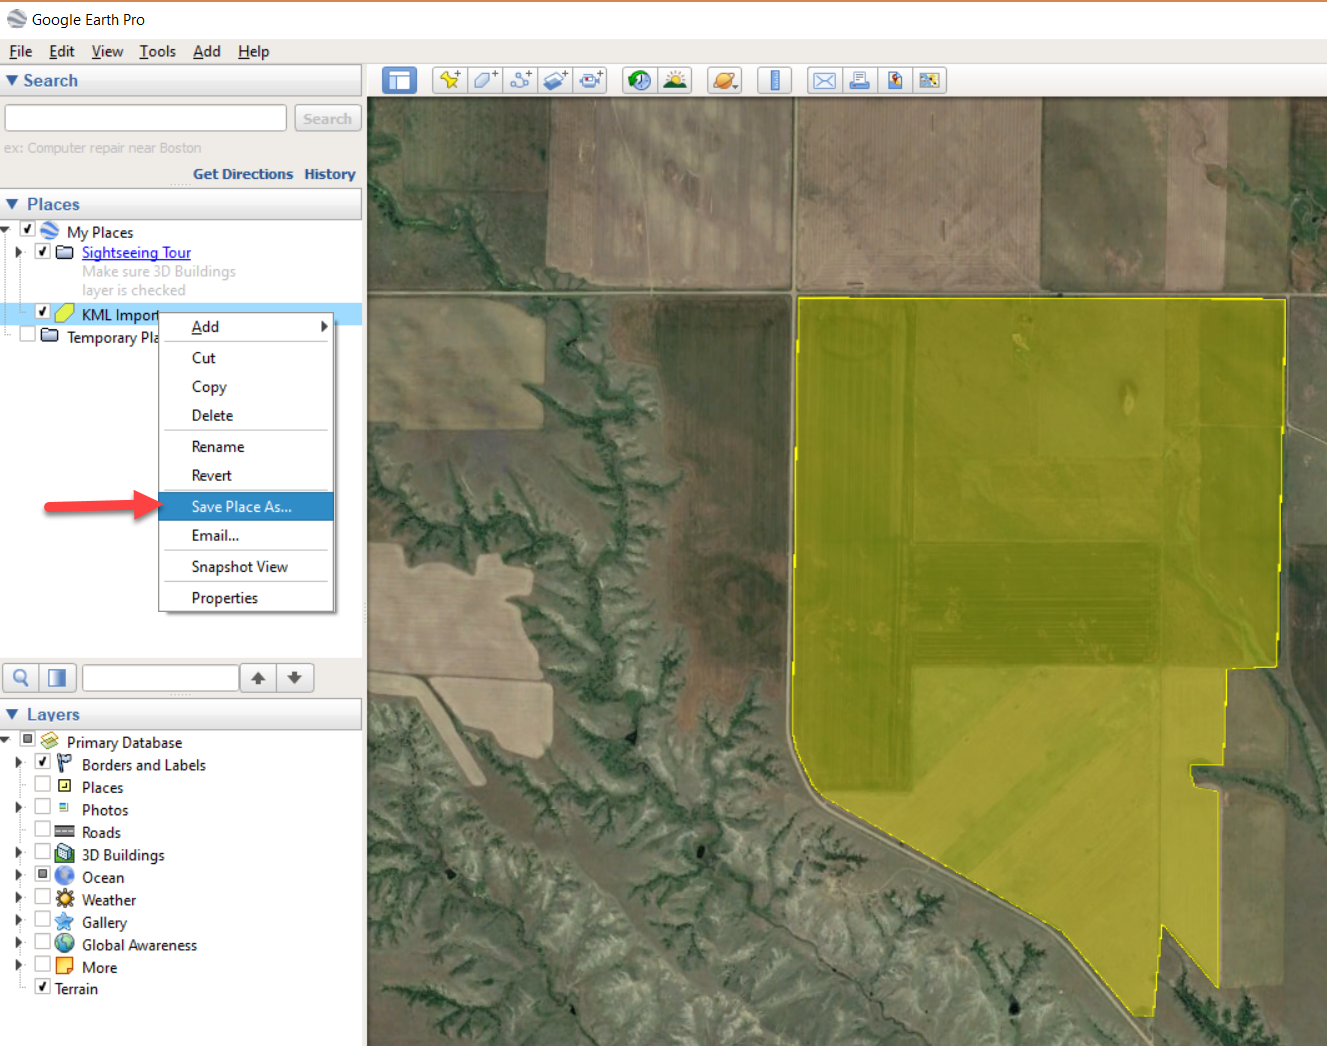
The 2nd method is to import a KML file generated by another program such as Google Earth or Surety mapping (in this example, Google Earth Pro is used).
|
To export the KML from Google Earth, right-click on the polygon in the places window and select Save Place As…, navigate to where you want to save the file and click Save.
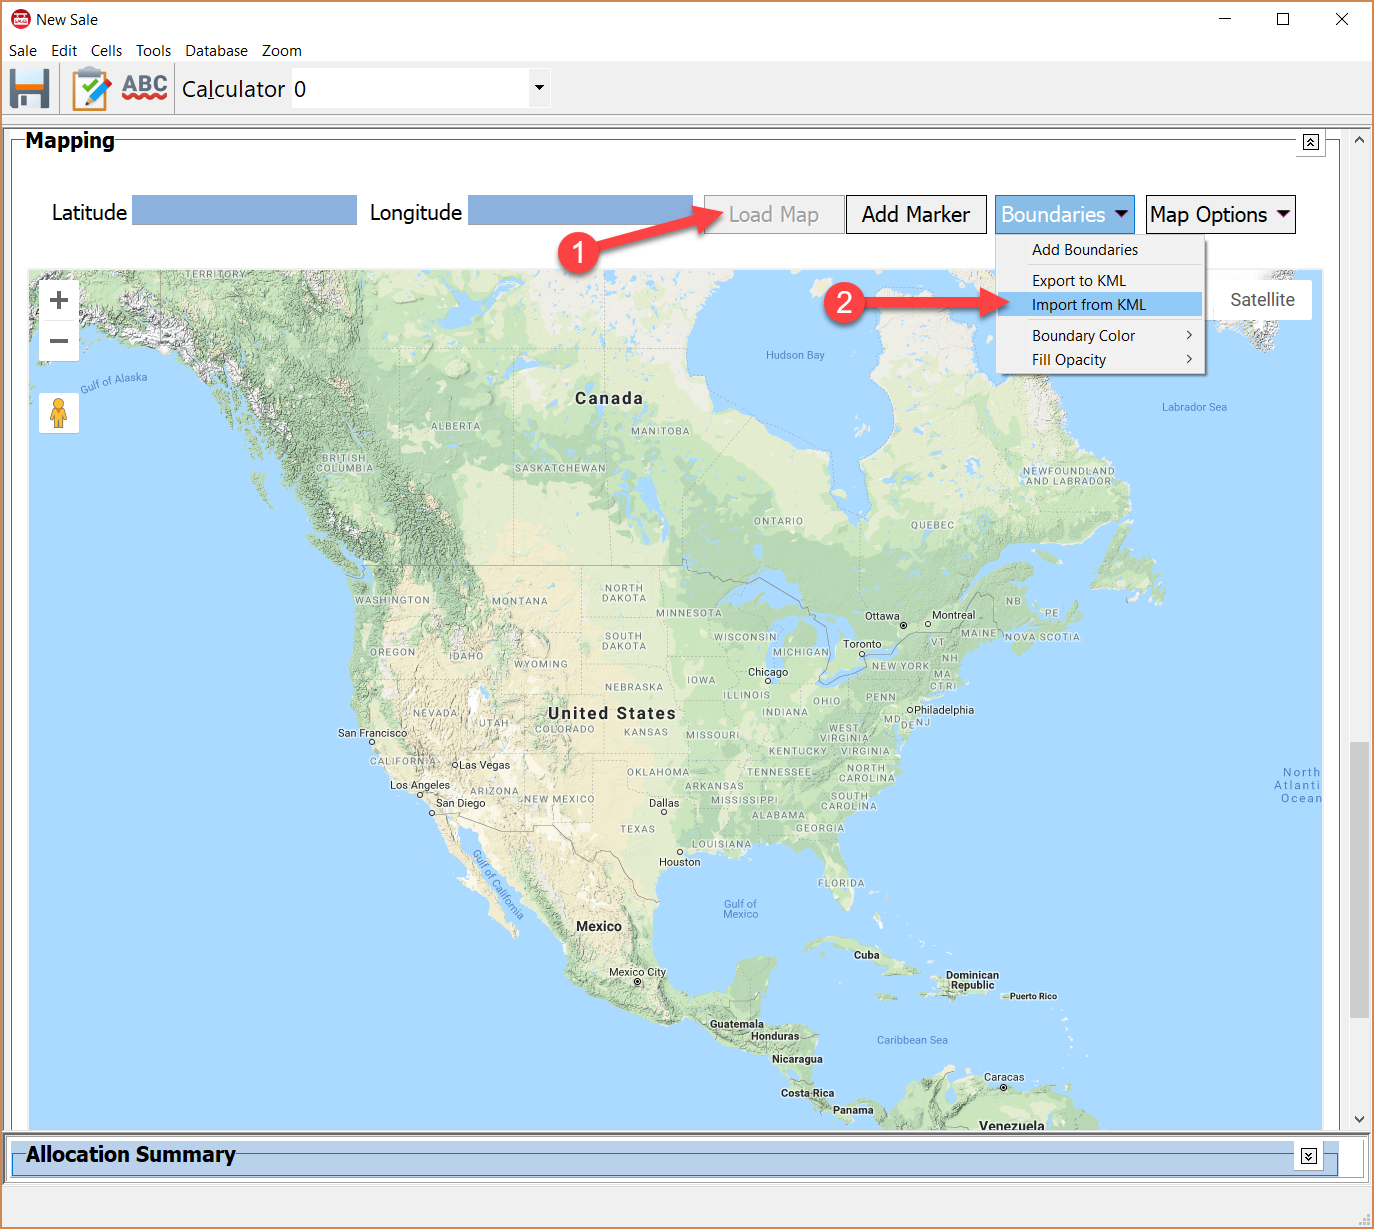
|
In the DataLog sale editor, click Load Map, then click on Boundaries and select Import from KML.
|
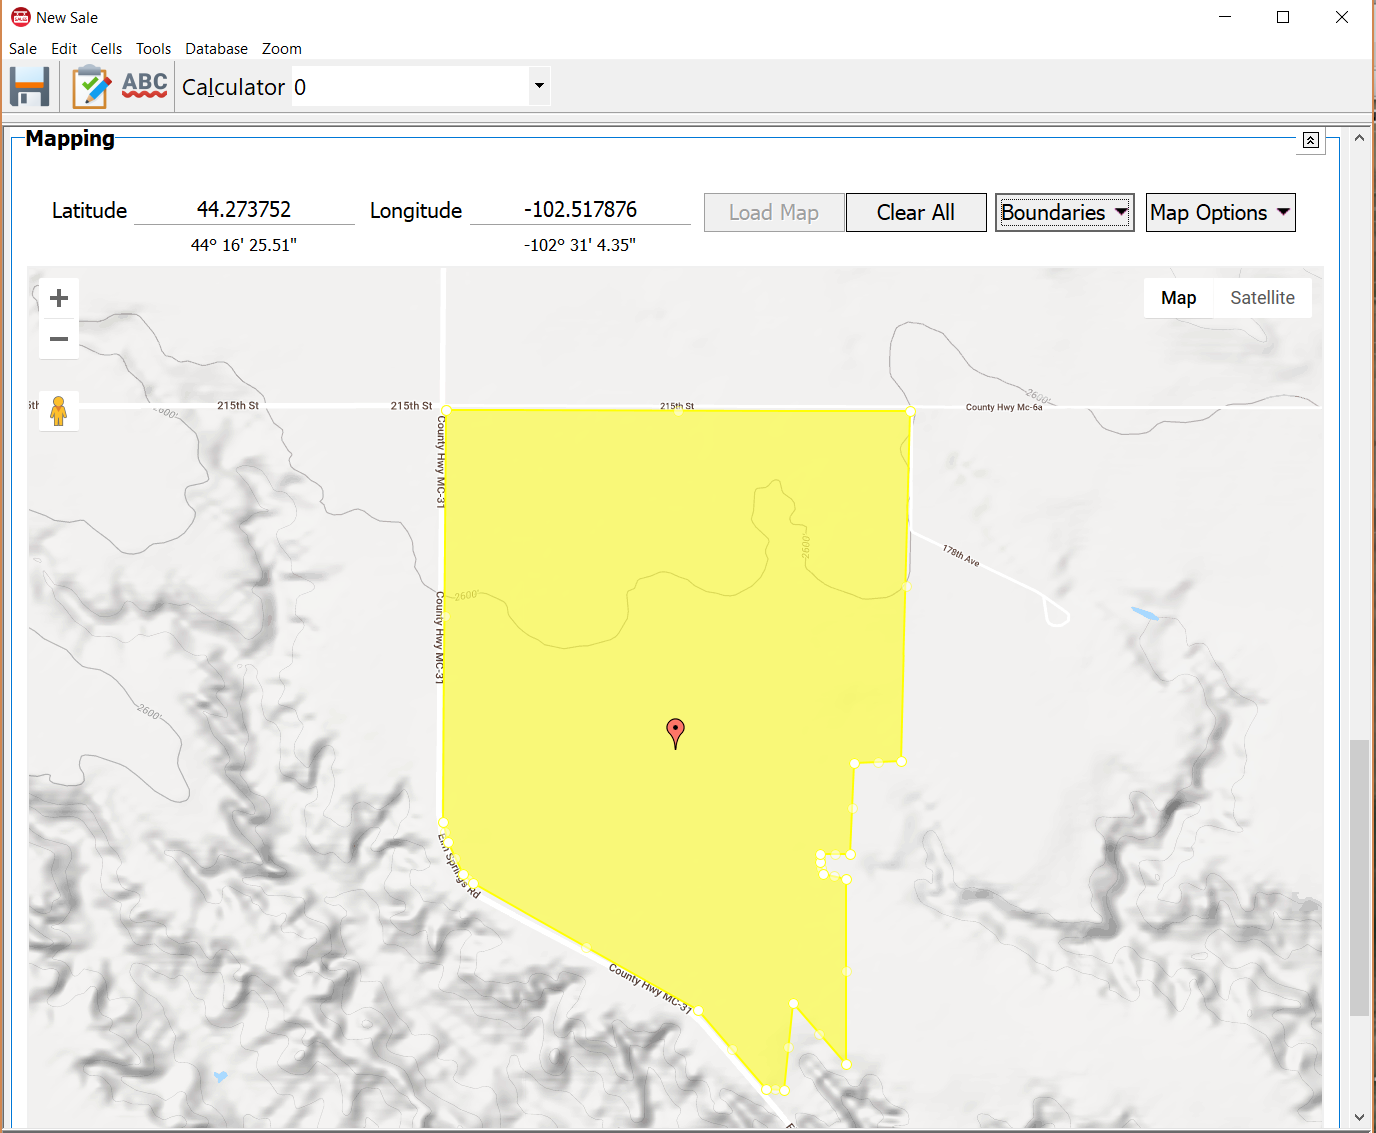
|
Navigate to the location of the saved KML and open it. It will automatically drop the pin on each polygon.
|
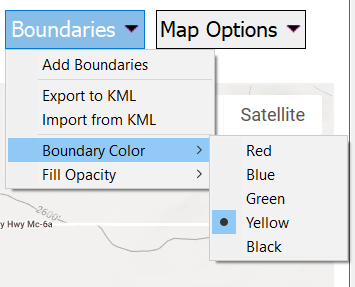
The Boundaries dropdown has options to change the color and opacity.
|