Batch Posting
![]()
AgWare DataLog has an enterprise-specific feature that will post a group of sales all at once, bypassing the rule set rules.
The feature can be found on the left hand side of the program under the Server Setup menu and it is called Batch Post (1).

Clicking Batch Post displays several items, each with various options, to be applied to the batch post.
Two selections are absolute requirements for any batch post: a folder and an access group.
The remaining options are just that: optional.
To begin any batch post, first select the folder where the sales currently reside.
Click on the ellipsis button at the end of the line (2) and make a selection from the directory (3).
All sales in this folder will be included in the batch post.
Once a folder is selected click OK (4).

Use the drop-down for Access Group on the Pre-Processing tab to select the desired option.
The remaining items and selections on the batch post screen are optional as explained above, and they will vary by user and possibly by folder.
Please note that exactly as described above, these additional options also apply to all of the sales in the selected folder.
Pre-Processing Tab
The Un-named Attributes field allows you to name any attribute value fields that are missing the attribute name.
This will only affect those attribute rows that currently have a value entered, but no name.
The category field will update the sale sheet field with the value you input on the batch post screen.
This will apply to all sales in the folder that you are batch posting.
If there are any values already in the category field it will update them to the new value.
If you check the Update Empty Calculated Fields check box it will force all calculations to occur when batch posting.
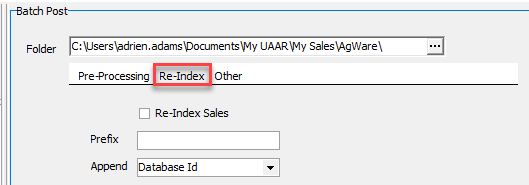
Re-Index Tab
The first option on this tab is the Re-Index Sales check box.
If checked, all of the sales in the folder will be assigned a new index number based on the next two options.
You can add a prefix to the current sale index by entering a value in the prefix field.
Similarly, you can append the database ID to the sale index by choosing that option in the drop-down.
To generate a new sale index number altogether, choose Get Sale Index from the Append drop-down.
Other Tab
The items on the Other tab are self-explanatory.
Check the box next to an option to apply it.

Once all options selections are complete, click the Start button.
A start message is displayed in the white space just below; it includes the number of sales to be batch posted.
A progress bar indicates the percentage of completion during the process.
Once the batch post is complete, “Batch Post Complete” is displayed in the message window.
If any sales were in error during the batch post, error details will be displayed in the message window.
Click the “Save Results” button when errors occur to provide an easy means of reviewing them in a saved file.
When prompted to do so, name the text file and choose a save location.
For assistance with deciphering batch post errors, feel free to email the results file to support@uaar.net and we’ll be happy to help you.