Edit Menu
![]()
The edit menu is the second menu item in DataLog, and is located near the upper left hand corner of the program. It contains 2 items; Configuration and Manage Add-Ins.

Configuration:
There are six tabs in configuration that allow the user to modify their user settings, system configuration, and registration information.

1. User Settings -
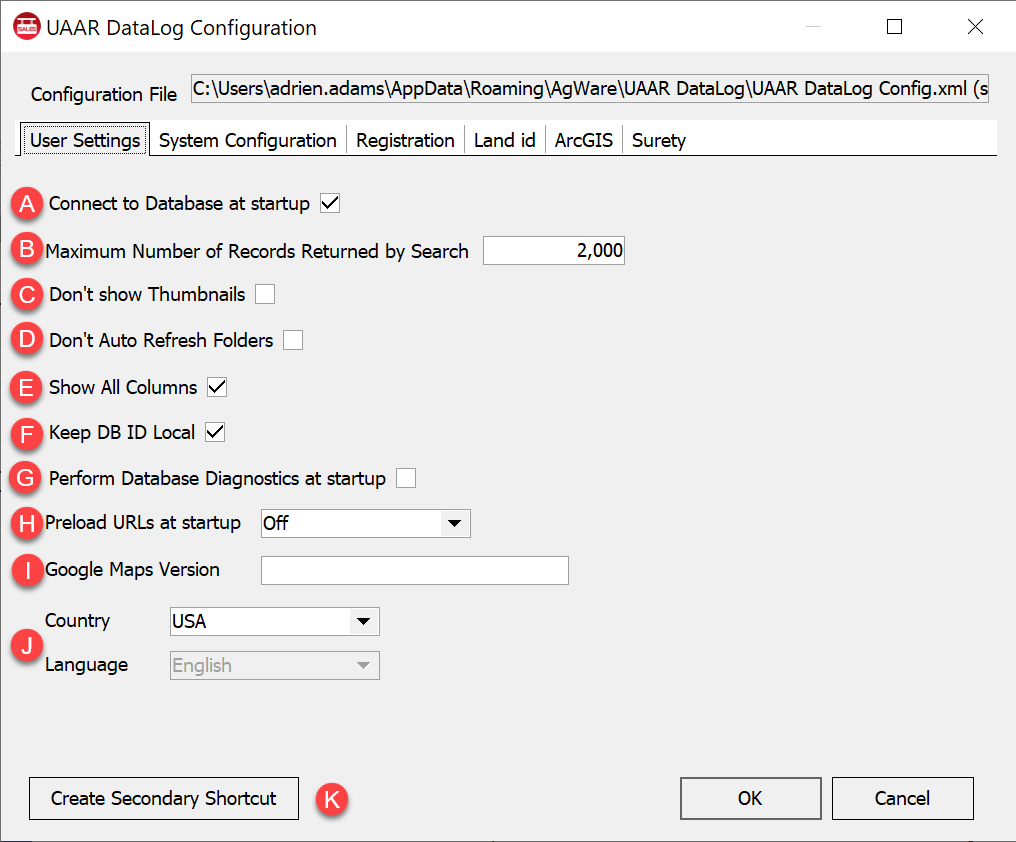
A) Connect to Database at startup: allows the user to choose whether the database is automatically connected at startup (This option is only visible to Enterprise and Small Business licenses)
B) Maximum Number of Records Returned by Search: the default value is 2,000; users can change this if desired. For enterprise users, AgWare recommends leaving the default as-is.
C) Don’t show Thumbnails: when checked this setting turns off the attachment thumbnails on the sales. The detail view will be used.
D) Don’t Auto Refresh Folders: when checked this setting turns off the sales grid refresh that shows updated data when a sale is added or modified. Users can press F5 on their keyboard to manually refresh the sales grid. This should only be checked in cases where the user is having unexplained refreshes that are interfering with their use of the program.
E) Show All Columns: turns on the extra columns in the sales grid so that users can add them to their grids. Such fields include: expanded grantor and grantee information, expanded financing information, etc.
F) Keep DB ID Local: AgWare automatically assigned a Database ID to each sale. These Ids are saved in the My Sales folder. In most cases this is the appropriate location. Users on Corporate Networks may need to change this location to avoid conflicts with other users. Note: Enabling this option will cause your DB Ids to change when moving your database to a new computer.
G) Perform Database Diagnostics at startup: when checked this launches the diagnostics before opening DataLog. Users should only check this when prompted to do so by AgWare support staff.
H) Preload URLs at startup: Was added for some users that needed to overcome some issues with some outgoing firewalls. This should be left alone unless directed by AgWare or the IT department.
I) Google Map Version: Allows user to change what version of Google maps to use. Version information can be found at https://developers.google.com/maps/documentation/javascript/versions
J) Country/Language: At this time there is only two country options; USA and Canada. If the country is set to Canada, the language option will then be able to set the language to either English or French.
K) Secondary Shortcut: If multiple databases are being accessed, this button will add a secondary shortcut to different databases. This will add an additional DataLog icon custom named by the user point to the database that was selected when the shortcut was created. Adding a shortcut is adding a new instance of DataLog so no sales will be populated in the sales folder initially. When the database is searched and sales are moved into the local folders, they can also be dragged from the shortcut DataLog grid to the normal DataLog sales grid.
2. System Configuration -
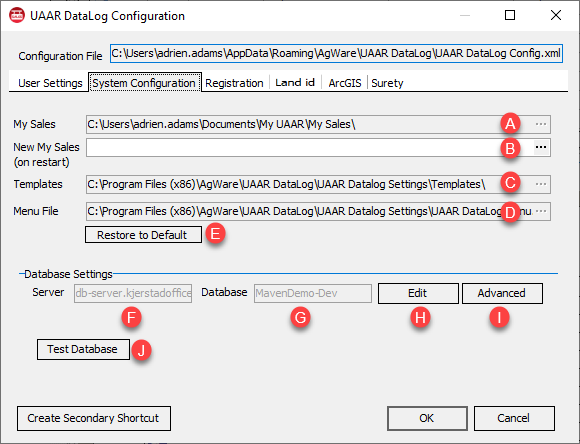
A) My Sales: Displays the path to the current My Sales folder.
B) New My Sales (on restart): If sales are stored in a special location such as a network drive, use the “New My Sales (on restart)” to enter the path of the sales location or click the ellipsis to browse to that location. This will reroute the My Sales folder to the new location.
C) Templates: Displays the location of the view templates for the sale viewer section of DataLog.
D) Menu File: Displays the path to the menu file XML.
E) Restore to Default: Clicking this will reset the templates and menu filed to the default locations.
The database settings section is for Enterprise users only; contact your IT department if you need assistance getting connected to the Enterprise Database.
F) Server: Displays the name of the SQL server and the instance.
G) Database: Displays the database name.
H) Edit: This is where the server name and instance are entered along with the authentication type.
I) Advanced: This button brings up a dialog with more advanced options. It contains the connection string and the login timeout can be changed. This should only be used if directed by AgWare or the IT department.
J) Test Database: Test the current connection string for connectivity.
3. Registration -
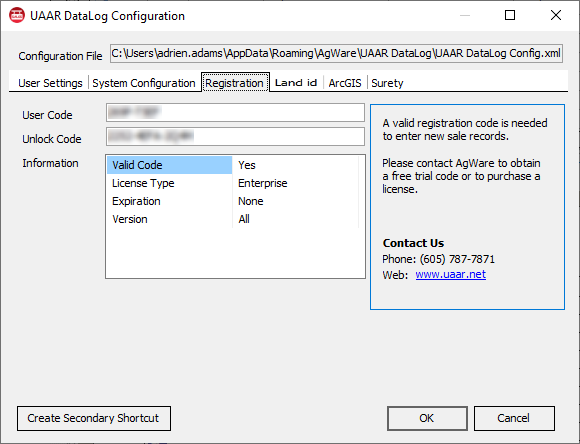
All registration and license information is found on this tab. When a valid code is entered, the license type and expiration date are displayed below.
4. Land id -
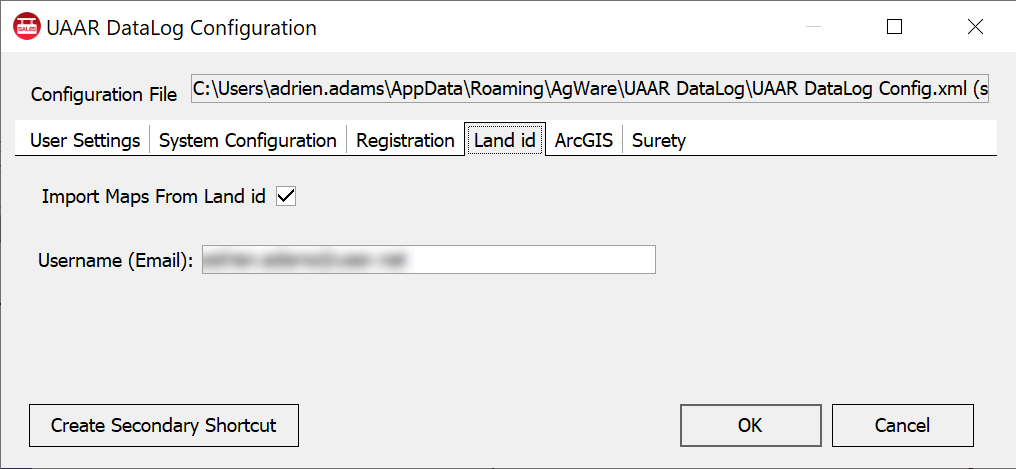
This tab enables the import from MapRight feature (a MapRight account is required to use this). More information on MapRight integration can be found in the MapRight Integration article found in this documentation.
5. ArcGis -
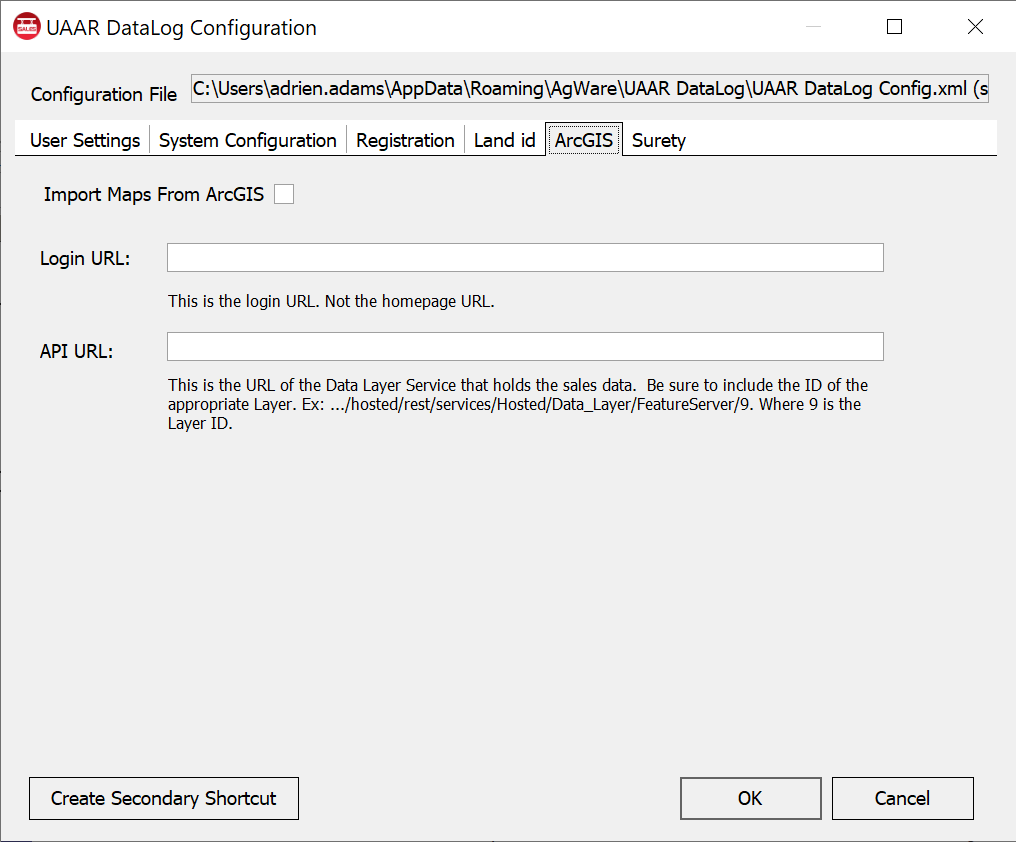
This feature was added as a request from one of our Enterprise associations.
6. Surety -
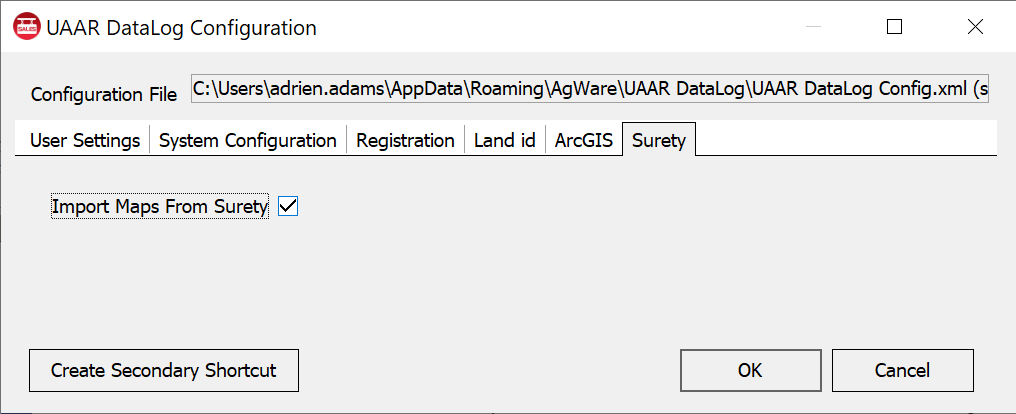
This tab enables the import from Surety feature (a Surety account is required to use this). More information on Surety integration can be found in the Surety Maps article found in this documentation.
Manage Add-Ins
There are sections in the AgWare Add-in Manager: Microsoft Excel, ODBC Access, template designer and a launcher for the Excel Lookup Helper tool.
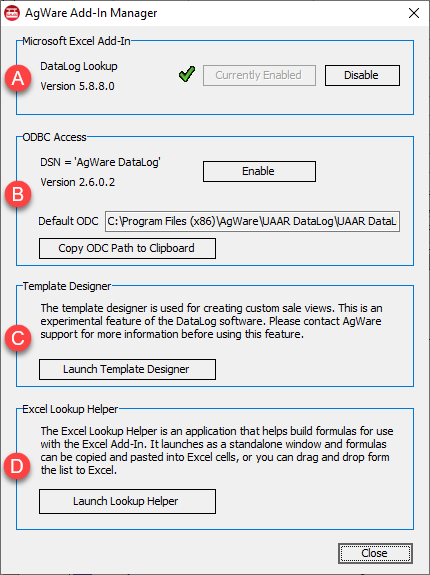
A) Microsoft Excel Add-In: allows users to transfer a specific sale’s data into Excel. This gives the user flexibility in creating their own sale layout. Worksheets can be created to perform additional analysis calculations that aren’t offered in DataLog, without requiring the user to re-enter sales data. Simply click the enable button to enable this add-in. More information on this tool can be found in the Excel Add-In - Export Sale Data to Excel article found in this documentation.
B) ODBC Access Add-In: once enabled, this add-in gives the user the ability to present DataLog data in a Microsoft Word document and utilize the mail-merge function.
C) Template Designer: used for creating custom sale templates. As noted in the add-in manager this is an experimental feature of DataLog. These sale templates created in the DataLog template designer will not be available in ClickForms; they are used strictly for DataLog. More information on this feature can be found in the Viewer Template Designer article found in this documentation.
D) Excel Lookup Helper: Launches the Lookup Helper tool. A tool that allows users to drag and drop DataLog fields into an Excel file. More information on this feature can be found in the Excel Lookup Generator article found in this documentation.